Saturday, March 30, 2013

How to Blow Out Eggs

Just in time for Easter!

After several years of trying different methods, I think this is the method that works quickest and best for me.  Here's what you need:

1.Duck eggs. You can do it with chicken eggs, but they are far more fragile, so you will have to take more time.

2.A large syringe and needle. I use a 60cc syringe and a 14 gauge needle. I bought mine from my vet.

3. A bowl of clean water.

4. Play dough or something similar. We had made salt play dough this week and it worked great.


Step 1. Push down firmly on one end of the egg. Your needle should be very sharp and will go through smoothly.  Chip around the hole with the needle until it is about 1/4 inch. Hold with hole on the bottom and poke around inside the egg a few times to break the yolk.


You can try to make a smaller hole than this, but I go for speed and efficiency.


Step 2. Pull back the syringe to fill with air. On the opposite end of the egg, push through the shell with the needle. Apply firm pressure and the white and yolk will come out of the other, larger hole. This is where is is easy to fill chicken eggs with too much pressure and they will explode on you.


Step 3. Fill the syringe with clean water. Spray this into the egg to rinse the inside.


Step 4. Using a small ball of the play dough as to help seal your smaller hole, fish the syringe with air and push this into the egg to remove any remaining water or white/yolk.


Step 5. Place eggs in carton, large hole side down, with paper towel underneath. This will help it to drain and  dry quickly.


Now you are ready to dye!


Emptying the eggs this way will make them last for years. It is so neat to have bowls of these around the house at Easter time. And so many wonderful memories are attached to them too.


Friday, March 29, 2013

Operation Organize!

My story started as the typical romance fairy tale.

I met my soul mate, we fell in love. Got married, bought a house. Everything was clean and shiny. Everything had a place. We had a miscarriage, but shortly after along came our first child. I delighted in washing, folding and neatly organizing all of her tiny pink clothes. Then somewhere in between losing a second child, having a very uncomfortable 4th pregnancy, giving birth to our other wonderful daughter, the onset of chronic pain and homeschooling, I lost control. Oh every now and then I would tackle an area that I could no longer function in. And we clean. But it's often the "company's coming" type of cleaning. You know, where you clean the  main areas, then stash and dash all of the rest into a room and close the door. I'm not saying we live in filth. It's just clutter. And now that my girls are big enough to help me with the maintenance, it is the perfect time to change that.

The first step I made was to create and inventory of my house. You see, I need to feel a real return on my investment, and what better than to be able to make a check mark. Well, actually several check marks would be better.


I have literally broken down every room in the house into areas that I will be able to clean and organize, a bit at a time. The task doesn't seem overwhelming because I'm not trying to organize the whole house all at once. We have a few days off for Easter break, so I am tackling my most frustrating areas in fairly large chunks. After that, one item a day will be my goal. And I think that's very do-able.

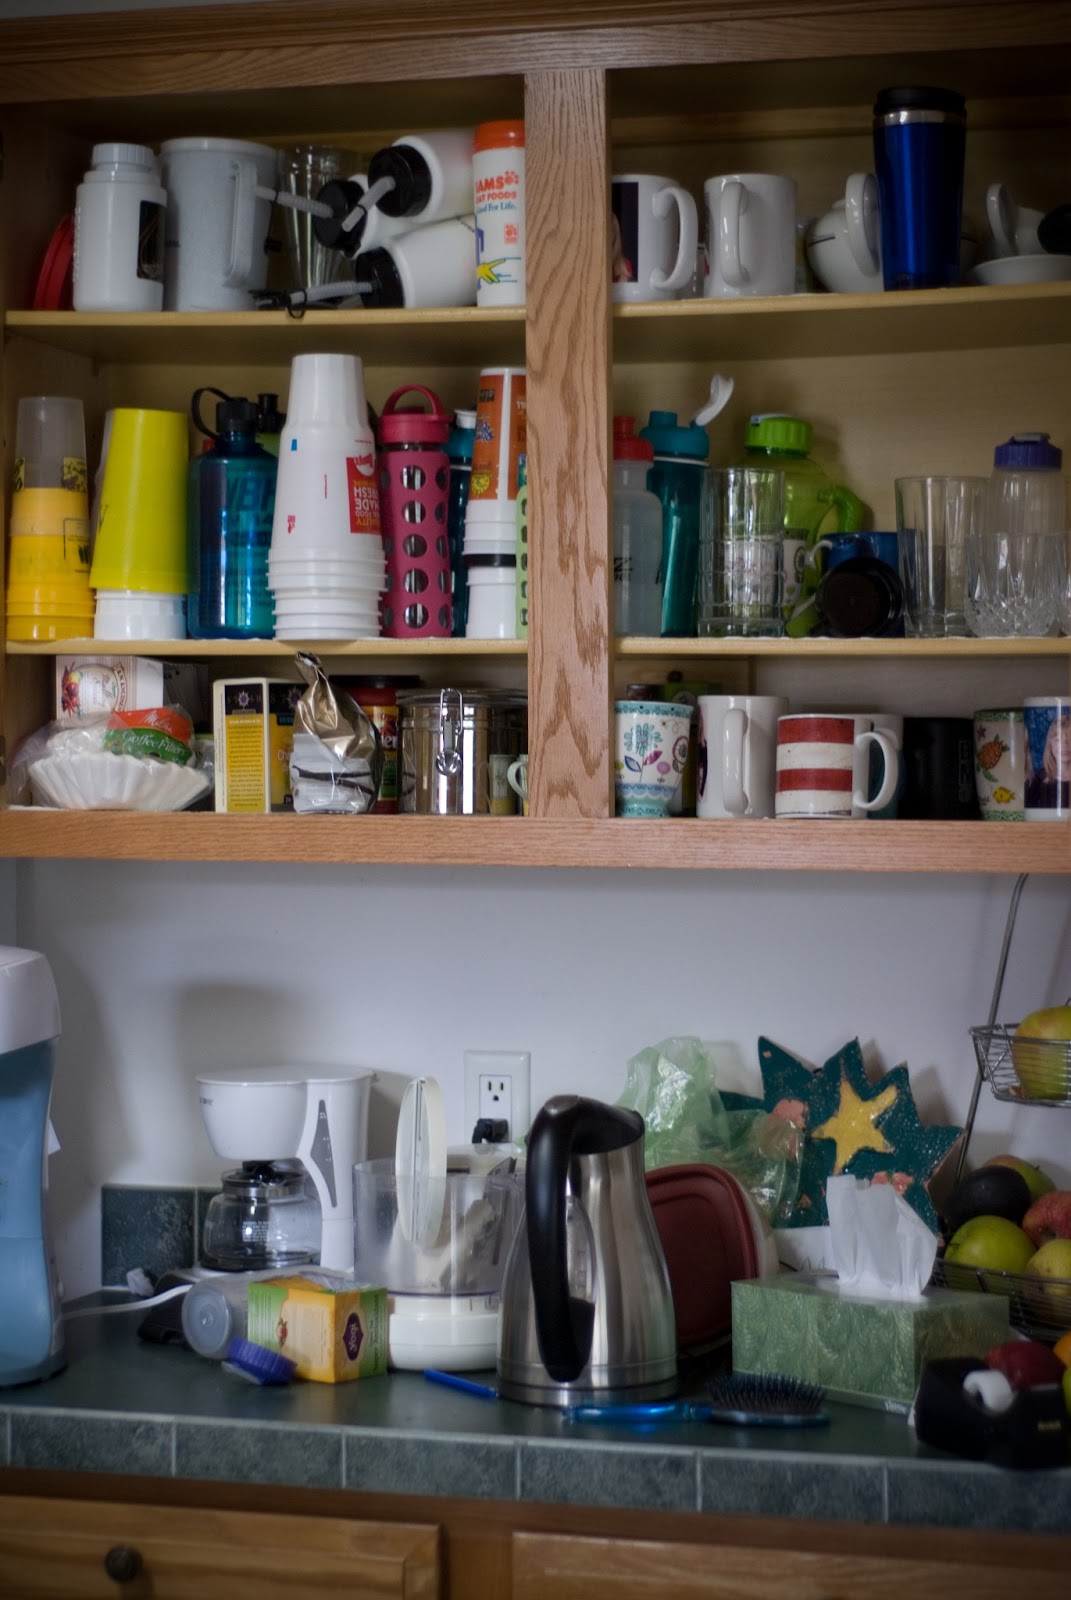
Today: The dreaded Tupperware cupboard, and the kitchen counters. See Exhibits A & B below.


And the cup cupboard. Wait, that's like a duplicate. The cup boards? Aw, heck. The cabinet that contains the cups.


I swapped out these two cupboards to give better flow, but it also seems to add a further sense of newness.  After 10 years of going to the same cabinet to get my cups, it has made for an interesting afternoon.

All of my kitchen counters are now clear, clean and make me smile. In fact I think I'll go back to the kitchen to admire them again right now.


Much better!


And best of all, apart from a few papers that I need to work on, everything else on the counters was addressed, cleaned and found a home for. Check, check, check.

Really, I am smiling at my kitchen counters. And I think they may be smiling back.

Sunday, March 24, 2013

Squash Soup


One of my all time favorites. It is very rich and I always eat too much.


Ingredients:
1 Acorn Squash, microwaved until tender, scoop out flesh
3/4 cup Carrots, microwaved until tender
2 cups hot Vegetable Broth 
3/4 cup Unsweetened Shredded Coconut (Or Coconut Milk)
1 tsp Curry Powder
1/2 tsp Cumin Powder
1/2 tsp Corriander Powder
1 tsp Salt 
1/2 tsp Pepper

Put hot vegetable broth and coconut in the blender and blend. (For a smoother soup, you could use coconut milk instead of shredded coconut, but I liked it as is).
Add the acorn squash, carrots and spices.
Blend until smooth. Enjoy!

Pink Grapefruit


I don't like grapefruit, except like this.

1 Pink Grapefruit, cut in half. Slice down each side of the segment membranes to make for easy removal later. Place on a cookie sheet. Set oven to broil with oven rack in top position.

Drizzle each half with a teaspoon or so of honey. Put under the broiler for 3-5 minutes. Take out and immediately sprinkle with salt (about 1/2 tsp each). So good!

Brownies My Way

Even I was surprised as to how good these turned out. You can't eat these and expect them to taste exactly like a store brand box mix, but they are smooth and chocolaty, and work really well for a sweet treat when using the Paleo diet.


Ingredients:
8oz Creamy Roasted Almond Butter
2 Eggs
1 1/2 cups Honey
2 tsp Vanilla Extract
1 Avocado, mashed
3/4 cup Cocoa Powder
1 tsp Salt
1 cup Almond Flour
1 cup Unsweetened Shredded Coconut
1/2-1 cups Dark Chocolate, chopped (I used Green & Black's Organic 85% Cacao)

In a large bowl, blend almond butter, eggs, honey, vanilla and avocado, using an electric mixer. In a small bowl, mix cocoa powder, salt, almond flour, and coconut with a fork. Add to almond butter mixture and blend further with the mixer or by hand. Stir in chopped chocolate.

Pour into a greased 9x13 pan and back at 325 degrees for 30-45 minutes.

Flash, making sure I was doing it right.

Smoked Salmon Stuffed Portabello Mushrooms


Ingredients:

3 Portabello Mushrooms, stems removed. Gills removed if desired.
1 Small Zucchini, diced
1 Tomatillo, diced
1/2 Small Onion, diced
2 Garlic Cloves, sliced or crushed
Olive Oil
Salt
Pepper
1/2 tsp Basil
1/2 tsp Oregano
2oz Smoked Salmon

Saute zucchini, tomatillo, onion, garlic, basil and oregano in olive oil until soft. Put them in a food processor with the smoked salmon and pulse until blended. Sprinkle olive oil on the tops of the mushrooms and put on a cookie sheet, gill side down. Put under broiler for 3-5 minutes. Take out, turn over. Sprinkle inside with salt and pepper and then fill with the salmon mixture. Put back under broiler for another 3-5 minutes.

This was a very tasty and filling alternative to one of my favorite dishes. If I was not on the Paleo diet, the only thing I would change is to add cream cheese. Because what's better than smoked salmon and cream cheese. Other than strawberries and cream. Or chocolate and...well, anything.

Wisdom

I have a couple of homeschooling ideas that I wanted to share with you today. The first is a state quarter map. I bought these books years ago, way before the girls were old enough to do anything with them. The other day I decided to pull them out, along with a big jar of coins we've been saving. I had the girls sort the quarters first, and then divide the quarters into regular issue, and state quarters. Then they found the states in their book and placed the quarters in their spot. It was a great way for them to identify where the states are, and a few facts about them. Some books have more info in them, some less. You can get these books through Amazon like this one, and some hobby stores also carry them. 


Through our jar, they have the book about half way filled, leaving plenty for them to keep their eyes open for in the future.


The other thing is a book by Jennie Bishop called "The Princess and the Kiss". It is a delightful tale of a princess finding her true love with the underlying theme of purity. It also has an accompanying "Life Lessons" book that helps to solidify in a young girl the notion that her kiss (heart, purity) is precious and should not be given lightly and without determining whether the match be God's will.


It's a light-hearted book, and the discussions can be lighter or deeper depending on the age of the child. The Life Lessons book also has activities and craft suggestions, which my girls are always in favor of.


There is also a version for boys called "The Squire and the Scroll", which I would be really interested to read at least. And I would like to know if any of you have sons that you are doing this program with. I will be making a list of their names for later. :)


And I don't think it's ever too soon to tell my girls that to God, they are precious princesses. It may not stop them from making every mistake when they are older, but if it saves them even a little heartache, it will be well worth it.